Friday, November 22, 2019


WHMS WreckingBots 2.0 Considerations and Build

WreckingBots 2.0
WreckingBots is a game where robots wreck the tower of cubes, drop the opponent's cubes into the corner bin and push the opponent's' base switch to decrease the opponent's' life {by point system). Robots should be built in a way that it survives the 5-minute game of physical contact with other robots.


Playing Field
1.    The playing field is 16' x 16' in size.
2.    Each base has an area of 3 feet square.
3.    The ball switch has about 1' clearance from the ground.
4.    The ramp incline is about 26 degrees.
5.    There are 20 blocks in total (10 blocks for each team)

Robot Specifications
1.    The maximum size of the robot is 3' x 3' (length and width) and must fit in the base.
2.    Weight and height are unlimited.

Not Allowed
1.    Chemical or liquid
2.    Fire or flammable materials
3.    Rope, strings, or similar materials to damage robot operations
4.    EMP generators
5.    Signal jammers
6.    Blades
7.    Projectiles
8.    Explosives
9.    Guns
10.  Sticky materials

General Rules

1.    Robots may be autonomous or remotely controlled.
2.    Failure to show at the playing area 2 minutes after the scheduled time will cause the team to forfeit the game.
3.    Judges decision is final.
4.    The referee may recall teams for a tiebreaker round if needed.

Rules

1.    All robots will have 100 life points at the beginning of the game with a designated color of block and base.
2.    Robot's life diminishes depending on the color of the block dropped completely into any of the crates by any robot. Each block dropped is equivalent to –5 life points.
3.    If the switch of a base is tripped once (indicated by a solid light), the robot of that base may Jose 20 life points. It can be switched back to regain life points.
4.    If the switch of a base is tripped again (indicated by blinking light), the robot of that base may lose 30 life points. It can be switched back to regain life points.
5.    There will be at least a 15-minute break between elimination and final rounds to enable winners to fix their robots and have it inspected again.
6.    The robot that has the most life points at the end of a 5-minute elimination match wins the game and advances to the final match.
7.    Scores will reset in the final round.
8.    Once a robot is immobile, damaged beyond repair, or thrown out of the playing field, it will be considered a "knockout" and the other robot wins regardless of points.

property of robotnook.com
©2015 Mario Malabunga. All rights reserved.


These are the published rules for the competition build.  In order to determine the best build, we have to break the competition into tasks.

1.       No larger than 3x3 ft and fit in the Base.
2.      Be able to pick up blocks and transport them up the ramp and into the basket.
3.      Move the ball switch back and forward.
4.      Be able to drive up a 26-degree slope.
5.      Be tall enough to not get stuck on blocks (2").
6.      Be robust enough to not be wrecked by the opponent’s bot.

Now let’s talk about build considerations:

1.       If gearing is an option, consider it.
2.       Have an articulated arm and be able to move it vertically, and horizontally in 3D.
3.      Last year there were several bots that high centered on blocks, effectively immobilizing them for the entire match.  Make the suspension high enough to drive over blocks and up the ramp.
4.      If the frame is higher, it needs to be wider to prevent being pushed or tipped over because the articulated arm must operate at an average height of 1 ft off the ground.
5.       Articulated arm can be dual purpose…tripping the ball switch and picking up blocks. 
6.       Last year, the WHMS WreckingBot fell apart on the field.  Consider using nuts with nylon inserts to prevent them from falling apart under duress.
7.       Several bots last year lost their sync with the controller.  Harden the connections and controllers to ensure it maintains sync.  You can’t touch it after it starts. 


I will add more as time permits, including photos.


Monday, June 10, 2019

Robotics Component Description


What are the building blocks of a basic robot?


These are the building blocks of a robot. There may be others, but these will get the basic configuration and completion of a robot that will meet most requirements.


Basic

Structural members. Structural parts will provide you with a strong framework for building your project. Channels, brackets, beams and more keep your project rigid and stable while also giving you multiple attachment points for expansion.

Connectors. Hardware that will keep your project together. This includes a variety of screws, couplers, and collars to secure everything.

Motors. DC Motors for any project that needs to get moving. Gears and sprockets would be nothing without these micro, standard, and precision gear motors!

Wheels or tracks. Mobility on your project is completely function driven, as is gearing and motor selection. The selection of Wheels should has something for just about any need. From the big heavy-duty off-road wheels, skate wheels, turf wheels to the various sizes of precision disc wheels, there’s a lot to choose from. Track provides options for high ground contact applications and off-road.

Axles, shafts, and tubing. Shafts and Tubing are used to either form rigid structure, or drive-shafts for wheels, servos, levers, and more. Most tubes can be wide enough to accommodate a multitude of wires to keep your project neat.

Mounts and Hubs. These parts let you support moving components, interface various structural components, and are the basic building blocks to connecting all components together. All hubs and mounts should connect together in a variety of configurations. This can be done using custom drilling and manufacture or through universal bolt patters available commercially or any combination of this.

Controller. The controller is a fully integrated, programmable brain for your robot that features a variety of motor, servo, encoder, and sensor ports with convenient connectors that enable you to control your robot's behavior. Some controllers are only for motors, some are for servos; some control both. Another component that goes hand in hand with the controller is the remote control for functions not defined by programming. We use an aircraft R/C quality low interference control console.

Battery pack. The robots need power to provide the voltage signals that make the motors turn, the sensors operate and the robot brain. The simplest way of doing so is to use batteries. Based on the needs of the robot for power, combinations of rechargeable batteries can be added to reach the desired power requirements.

Wiring. Just enough length of stranded wiring and specialty wiring harnesses to reach from point to point to power or allow control of electrical components.

Advanced components

Servos. Servo motors are essential in most robotic applications. We have a wide range of accessories from mounts, gears, and housings to make using them quicker and easier.
Gears. Transferring power can be tricky, but we have all the gears, pulleys, and sprockets to get the power where you need it. Best of all, you don't have to worry about spacing or getting things lined up perfectly, the hole patterns take care of that for you.

Sensors. Sensors replicate the senses of the human body and in some cases, functions that we don't have but can use to complete actions in an autonomous or controlled environment.

  • Cameras & Vision Sensors
  • Contact & Proximity Sensors
  • Gyroscopes
  • Infrared & Light Sensors
  • Linear & Rotary Resistors
  • Localization & GPS
  • Magnetic Sensors / Compass
  • Pressure Sensors
  • Sound Sensors
  • Temperature & Humidity Sensors

Arduino. A microcomputer that can be programmed that acts as the controller for the robot. It can define pre-measured sequences or it can use sensors to run decision sequences that allow it to have some autonomous activity.

Raspberry Pi. A microcomputer that can be programmed using a number of programming languages that act as the controller for the robot. It can define pre-measured sequences or it can use sensors to run decision sequences that allow it to have some autonomous activity.

Camera. Cameras or camera type sensors can be built into the robot to function as a remote viewer or recorder.

Specialty components. There are many specialty components like articulated robot arms, pneumatic suspensions, shocks that can be used to enhance a robot’s capabilities or to meet specific design goals.

Hydraulics. Hydraulics are a very advanced addition to any robot. They allow inclusion of rack and pinion type assemblies, stilts and rapid extensions in the design of a robot.

Tools needed

Drill Press

Miter saw with metal blade.

Titanium bits

Small Metal Brake


Friday, May 24, 2019

The ALICE Coding Environment


    One of the technology standards of the Hoke County STEM Competition is coding in the ALICE coding environment.  It is an object oriented, block based programming environment that allows kids to build games and animations using the system.  In our competition, competitors build animations to tell a specific story that is judged against the other competition.  It is a live, elimination event. Here are some details about the ALICE environment:
  • It is used by teachers at all levels from middle schools to universities.
  • It has a broad scope of application within the educational environment.
  • It was developed by Carnegie-Mellon University and is provided as freeware to introduce students to coding.
  • There are two versions available, ALICE 2 and ALICE 3.
  • CMU is very proactive in providing resources for education, practice, teachers, and students to enhance their ALICE experience.
Duke University has tutorials for learning to code in ALICE 2 & 3.  Here are the links to the YouTube videos:


Wednesday, April 24, 2019

Compatibility Standards in Hobby Robotics

Compatibility Standards in Hobby Robotics


During our last competition this year, I saw non-TETRIX MAX parts on some of the other schools' robots in every category.  That sparked the compatibility question and The coach, Mr. Courdway mentioned that someone had tried something the year before that came from outside the kits and the holes didn't line up.  So this begged the question...what are the standards for the different levels of robotics and what works together.  I am going to run through the major brands and finish up with scratch building.  

I might as well start with PITSCO TETRIX MAX.  This is the brand name on our educational kits and they use a metric flower pattern for their mounting arrangements.  

This pattern allows for the connections between structural components, servos and motors in arrangements that generally allow a great deal of flexibility in design as long as it stays withing the 45 degree constraints.

Next is a close match, the Actobotics system.  It features a pattern based around SAE measurements and has patterns at .770" and 1.50".  


As you can see from the diagrams above, they are not directly compatible with TETRIX MAX without modification.  That does not mean they should be discounted.  Actobotics has some great components that can enhance any build.  

Another fairly popular brand is Lynxmotion Servo Erector Set.  It has some very popular components and provides some solid servo capabilities.  The Servo pattern is first followed by the two structural patterns.  TETRIX uses a variation on this pattern.
Servo Pattern


Lego Mindstorms are built around the regular Lego brick pattern, but Legos makes an adapter that will allow you to add Mindstorms components to other systems.


FIRST/Colson was developed by FIRST and is not often seen.  VEX Pro, AndyMark, and Nexus use the pattern on some components and perhaps a few others that seek acceptance by FIRST.  

VEX uses a square mounting pattern for all components and offers no compatibility across platforms.
It is possible to hack the VEX components if necessary, but it is often a better proposition to get the components from another more compatible source.

Here is a comparison to all described patterns:


The final pattern of note will be motor mounting bolt patterns.  Various manufacturers use the following front mount pattern for their Spur Gear Motors:


Scratch Build or Part Modification

Assuming we will be building our robots using the TETRIX MAX base components and seeking ways to modify other parts to function with the TETRIX base.  LynxMotion is the closest pattern and Actobotics pattern allows a lot of cross use for the components of each.  

Another alternative is to get relatively inexpensive aluminum stock and drill the holes for the bolts int0 it.  This requires a drill press, a good set of metal drill bits and saws, and possibly a small metal brake.  additionally clamps and taps and dies would assist in the manufacture of specific components to complete your robot.  Here is an Instructible that illustrates the process.

https://www.instructables.com/id/Double-Drill-Channel/

Additionally, the information for this post was gathered from the following sites:

PITSCO.com
ServoCity.com
Lynxmotion.com
FIRST
https://www.robotshop.com/community/blog/show/hobby-robot-industry-standards-hubs-amp-mounting-patterns


Tuesday, April 16, 2019

FIRST TECH Challenge Rover Ruckus

The Rover Ruckus Challenge Guidelines


Here is a sample of the level of expectation for Middle and High School level Robotics Challenges under the FIRST program.

Wednesday, April 10, 2019

The Engineering Notebook


The Engineering Notebook


Alexander Graham Bell's notebook entry from a successful experiment with his first telephone


An Engineering Notebook Documents your Work

Not only do you use an engineering notebook to organize and document your work, it is also a place to reflect on activities and projects. When working in a team, each team member will maintain their own journal to help with collaboration.


Your engineering notebook should have the following:

  • An entry for each day or session that you worked on the solution
  • Entries that are chronological, with each entry dated
  • Clear, neat, and concise writing and organization
  • Labels so that a reader understands all of your notes and how they fit into your iterative design process

An entry might include:

  • Brainstorming ideas
  • Sketches or pictures of prototypes
  • Pseudocode and flowcharts for planning
  • Any worked calculations or algorithms used
  • Answers to guiding questions
  • Notes about observations and/or conducted tests
  • Notes about and reflections on your different iterations
Above borrowed from Pitsco.com.  


Related image

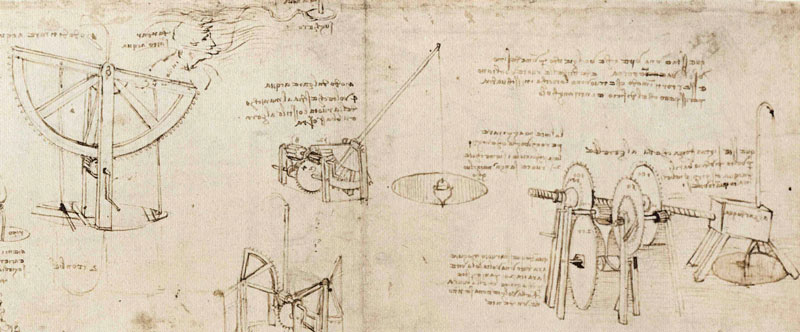
Pages from Leonardo Da Vinci's sketchbook of notes.  Engineers have been able to recreate some of his work in period materials based on the quality of his notes.


Image result for The Engineering Notebook

FIRST Engineering Notebook Guidelines

Under FIRST rules and guidelines, each team is charged with producing an Engineering Notebook that is judged as part of the competition.  It will catalog the thought processes, calculations, experiments, successes, failures and future design considerations.  For our program, each task based team should produce an Engineer's Notebook.  If you want, you can compare it to the Interactive NoteBook you use in your Math class.  While ours won't be judged, it is a good process to get used to doing and can eliminate duplication of effort.


Thursday, April 4, 2019

Title I school program challenges

The Challenges of Running a Robotics Program in a Title I School...


I had a discussion yesterday about the history of this program in this school.  I need to have a longer and more direct one, but here is what I learned:

  • There are between 20 and 40 students that participate in the program.
  • The school has a single TETRIX MAX Dual-Control Class Pack
  
  • The program is divided into Varsity and Junior Varsity.
  • I don't know how the programs divide the sets out, but that can mean as many as 4-7 students working on a single kit, making one robot.  
  • In our program, JV learns, Varsity competes. 
  • In our competitions, these middle school students compete against high school and early college teams.  
  • The other teams used aftermarket components, while ours used only kit supplied components.  I am exploring aftermarket compatibility and will let the students do that as we guide them.
  • This year, every team had shirts but ours.  This is a shortcoming we will address next year for the Varsity.  
  • In a district where funding doesn't necessarily provide everything needed for educational necessities, how do you justify additional funding for an after school and extra-curricular program?

Here are my questions to you.  

  • What are some sources of support for robotics within the schools?
  • How can we get enough sets to reduce the student to kit ratio in the program?
  • We want a strong program and to be competitive, but don't want to deny any student access to the program if they qualify.  
  • While this blog is specifically targeted to the students, I want to reach out to the parents of the students to inform them not only about the program and what their students are doing, but to get their cooperation and support.  We were essentially during this year's competition.
As with other posts, as I learn more about our program, this information may change.

Wednesday, April 3, 2019

Links to Robotics Projects from Around the Web

Here are some projects I found while searching for examples of builds.


4WD All Terrain Arduino Robot for Everyone


4WD Security Robot


6WD Robot With Aluminum Chassis


Remote Controlled 6WD All Terrain Robot


Six Wheeled All Terrain Vehicle (6WD)


SERVOCITY NOMAD Robotic Arm Attachment


Prototype Inspection Rover


Trackbot Mk V


Arduino Sumo Robot


National Robotics Week


Consider supporting your local STEM program for schools or a Robotics Team.  The resources required to run a program like this in a public school is high by budgetary standards.  They can use your help.

As a frame of reference:
$25 buys a motor
$50 buys a new battery
$150 adds controllers and sensors
$500 buys expansion sets
$750 upgrades drive train or buys a kit for 1-2 students

Wednesday, March 27, 2019

Using 12mm Hex Drive Wheels and Tires with TETRIX Max


Using 12mm Hex Drive Wheels and Tires with TETRIX Max


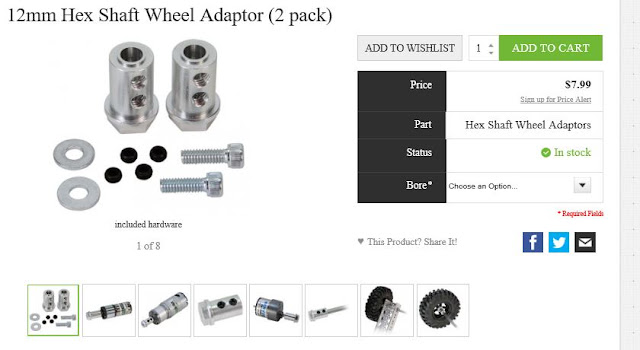
There are numerous outlets for 12mm hex drive tires and wheels.  While these components may not be the preferred choice for standard robot mobility, for those builds where speed, traction, ground clearance, turf traction, or Search and Rescue, these provide options not available within the robotics provider’s’ inventories.  In researching, I have found sources for wheels and tires.  Good, inexpensive, high-quality tire sets are available for 1/10th scale RC trucks and cars in 12mm hex drive.  They come in a plethora of tread patters in various degrees of aggression.  While the hex drive adapter used for the wheels will match, the connecting hex cap screw that holds the wheel to the hex adapter may not fit the center hole in the wheel.  If that is the case, there is an adapter kit available from ServoCity that fixes the problem.  It contains the screws, washers, and hex drive adapters to attach virtually any aftermarket 12mm Hex Drive Wheel set to your drive axles. 


Here is the tire with adapter:


Here are a few good sources for 12mm Hex Drive Wheel Sets: